Afraid of heat damage? Before you swear off your blow dryer, silk press, or flat iron forever, let’s talk about what heat damage actually looks like — and how you can check your hair at home.
If you have natural hair, especially tightly coiled hair, the words “heat damage” can make you nervous.
One silk press goes well, and then you start wondering:
Did I damage my curls?
Is this just dryness?
Why does this section feel different?
Is my hair permanently straight?
Do I need to cut it?
The good news is that not every change in your curl pattern means heat damage. Hair can temporarily behave differently after heat styling because of stretching, product buildup, dryness, or simply the way it was styled.
But there are also signs that the hair shaft has been permanently altered.
Here is how to investigate what is actually happening at home, without panicking and without immediately reaching for the scissors.
First: What Actually Is Heat Damage?
Heat damage occurs when excessive heat changes the structure of the hair shaft.
Your hair is primarily made of a protein called keratin. High temperatures can alter the protein bonds that contribute to your hair’s shape and strength. Once enough structural damage occurs, the original curl pattern may not completely return.
This is why truly heat-damaged hair can behave differently from the rest of your hair even after it has been washed and conditioned.
But here’s the important part:
Dry hair ≠ automatically heat-damaged hair.
Hair can be:
- Dry
- Rough
- Tangled
- Brittle
- Lacking shine
- Difficult to detangle
- Stretched from styling
without necessarily being permanently heat damaged.
So instead of judging your hair based on one symptom, look for a pattern.
The At-Home Heat Damage Test
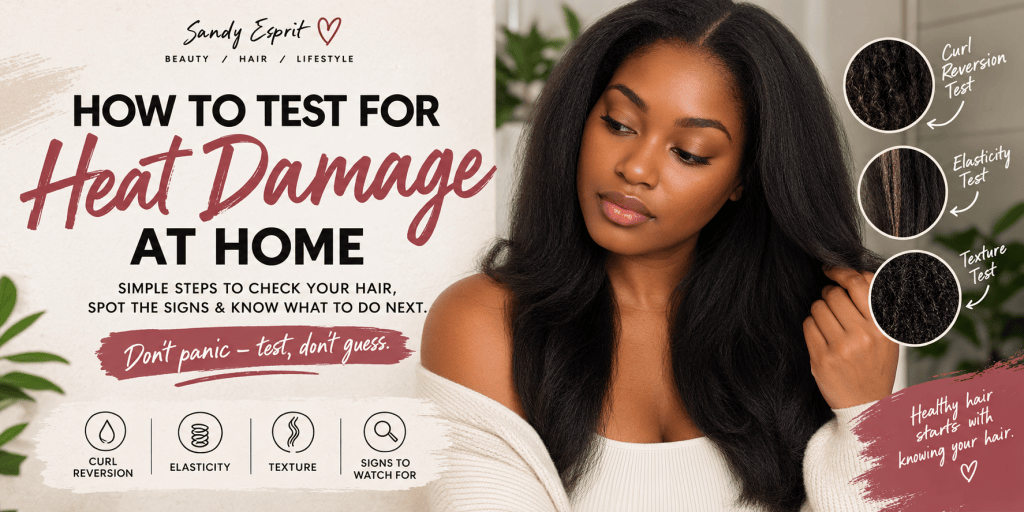
I recommend checking your hair using three things together:
- Curl reversion
- Elasticity
- Texture and behavior
Don’t rely on just one test.
And please don’t aggressively stretch, snap, or manipulate your hair to “see if it’s damaged.” The goal is to observe your hair, not create additional damage.
TEST #1: The Curl Reversion Test
This is probably the easiest place to start.
What you’ll need:
- Shampoo
- Conditioner
- Your normal wash-day products
- Water
- Your fingers or a detangling tool
Step 1: Wash your hair normally
Don’t try to “deep clean” your hair specifically for this test.
Use the shampoo you normally use and thoroughly rinse your hair.
Then condition and detangle as usual.
Step 2: Pay attention to your hair while it’s soaking wet
This is important.
Before adding your styling products, look at how your hair behaves when it is completely wet.
Take a small section from an area you’re concerned about.
Ask yourself:
Does this section begin to contract or form its normal curl/coily pattern?
If yes, that’s encouraging.
If one section remains noticeably elongated, straight, or limp while the surrounding hair is reverting, that’s something worth paying attention to.
Step 3: Compare it with the rest of your hair
Don’t compare your hair to somebody else’s curl pattern.
Compare:
your normal hair → to the questionable section.
For example:
The hair around my crown is shrinking and curling, but the ends of my hair remain completely straight.
That difference is more meaningful than simply saying:
“My curls don’t look as tight as they used to.”
But Here’s Where Things Get Tricky for Type 4 Hair
If you have tightly coiled hair, curl reversion isn’t always going to look dramatic.
Some areas may naturally have:
- Looser coils
- Tighter coils
- Different curl patterns
- Less visible definition
- More shrinkage
- Less shrinkage
And if your hair has been stretched, detangled, blow-dried, braided, twisted, or manipulated recently, it may not immediately behave exactly as it did before.
So don’t declare heat damage simply because your hair isn’t giving you a perfect wash-and-go.
Look for a persistent difference.
If you’ve washed your hair several times and a particular section consistently behaves differently from the surrounding hair, that’s more concerning.
TEST #2: The Elasticity Test
This is one of the most useful things you can check at home.
Hair has a certain amount of natural elasticity.
Healthy hair generally has some ability to stretch and return toward its original shape.
Severely compromised hair may stretch excessively, feel weak, or break very easily.
Here’s how to check.
Take a small strand of clean, wet hair.
Preferably choose a strand that has already shed naturally rather than pulling hair out of your head.
Hold one end between your fingers.
Gently stretch the strand.
You’re looking for how the strand behaves.
Healthy-ish behavior can look like:
Stretch → slight resistance → returns toward its original length.
Hair that is very compromised may:
Stretch excessively → feel weak/gummy → fail to return → break.
Or it may feel extremely brittle and snap with very little stretching.
Important:
Don’t keep stretching the same strand over and over.
You’re testing the behavior of the hair, not conducting a science experiment in your bathroom.
And don’t use a single strand to diagnose your entire head.
What If Your Hair Stretches A LOT?
This is where social media hair advice can get confusing.
People sometimes say:
“If your hair stretches, you need protein.”
It’s not that simple.
Excessive stretchiness can be associated with compromised hair, but hair elasticity can be affected by several things, including chemical processing, environmental conditions, and the condition of the hair itself.
Likewise, hair that doesn’t stretch much isn’t automatically heat damaged.
The test is best used alongside your other observations.
TEST #3: The Texture Test
This one is underrated.
When your hair is clean and wet, run your fingers gently along a section.
Compare the hair you’re concerned about with hair that you know has not been heavily heat styled.
Ask:
Does the texture feel significantly different?
You might notice that damaged areas feel:
- Rougher
- Drier
- More porous
- Frizzy even when wet
- Less smooth
- More fragile
- More prone to tangling
- Different in thickness
You may also notice that your ends feel completely different from the rest of your hair.
Again, one characteristic alone doesn’t prove heat damage.
We’re looking for a collection of clues.
The Most Telling Sign: Your Hair Behaves Differently After Washing
Here’s the scenario that would make me pay closer attention:
You wash your hair.
You condition it.
You thoroughly saturate it with water.
You aren’t using heat.
You aren’t stretching it.
You aren’t manipulating it.
And yet one particular section consistently:
- Doesn’t revert
- Doesn’t form its normal curl/coils
- Feels noticeably different
- Has different elasticity
- Breaks more easily
- Looks permanently elongated compared with the surrounding hair
That combination is much more suspicious for heat damage than simply having frizzy or dry hair.
Heat Damage vs. Dry Hair: How to Tell the Difference
This is where I think a lot of natural-haired women unnecessarily panic.
Dry hair may:
- Feel rough
- Lack shine
- Tangle easily
- Feel stiff
- Have increased frizz
- Need more conditioning
- Look dull
But after proper cleansing, conditioning, hydration and gentle styling, the hair may return to its normal behavior.
Heat-damaged hair may:
- Have a persistent change in curl/coily pattern
- Remain unusually straight or elongated after washing
- Feel different from the surrounding hair
- Be more fragile
- Break more easily
- Have altered elasticity
- Stay altered over multiple wash days
The key word is persistent.
What About the “Float Test”?
You’ve probably seen this one online:
Put a strand of hair in a glass of water and see whether it floats or sinks.
This is usually marketed as a hair porosity test.
I wouldn’t use it to determine whether you have heat damage.
There are too many variables affecting how a strand behaves in water, including oils, products, surface condition and the condition of the individual strand.
And porosity is not the same thing as heat damage.
So if your hair sinks:
🚫 That does not automatically mean heat damage.
If your hair floats:
🚫 That does not automatically mean your hair is healthy.
You don’t need a glass of water to figure this out.
What About the “Wet Strand Test”?
You’ll also see people recommend comparing how much a wet strand stretches.
That’s more useful than the float test, but it still shouldn’t be treated as a medical-style diagnostic.
Hair isn’t an identical material from strand to strand.
One strand can naturally behave differently from another.
That’s why I recommend looking at patterns across your hair rather than declaring your entire head healthy or damaged based on one strand.
A Better Way to Test Your Hair
If you’re genuinely concerned about heat damage, do this instead:
Your 7-Day Heat Damage Check
Day 1: Wash
Wash and condition your hair as you normally would.
No flat iron.
No blow-dryer.
No stretching.
No heat.
Day 1: Observe
While your hair is wet, examine several sections:
- Front
- Crown
- Sides
- Back
- Ends
Look for areas that behave differently.
Day 1: Check elasticity
Use a naturally shed strand and gently test its elasticity.
Day 1: Document it
Take photos.
This sounds excessive, but it’s actually helpful.
Take pictures of the questionable section wet and unmanipulated.
Don’t rely on memory.
Days 2–7: Leave it alone
Continue your normal low-manipulation routine.
Don’t repeatedly wash your hair just to test it.
Then observe what happens at your next wash.
If the Same Sections Still Aren’t Reverting…
Now you’ve got something more meaningful.
If you consistently see:
Same section + same altered texture + same lack of reversion + increased fragility
over multiple wash days, heat damage becomes a much more reasonable possibility.
At that point, you can decide what makes sense for your hair.
And that brings me to something important:
You Don’t Have to Immediately Cut Your Hair
I know.
The internet loves:
“If it’s heat damaged, CUT IT OFF.”
But hair decisions don’t have to be that dramatic.
If you’re experiencing suspected heat damage, you can first focus on:
- Gentle handling
- Regular conditioning
- Minimizing additional heat
- Reducing excessive tension
- Keeping your hair adequately moisturized
- Avoiding unnecessary chemical processing
- Trimming visibly damaged ends when appropriate
Hair that has undergone permanent structural damage cannot simply be “repaired” back to its original state by a product.
But you can care for the remaining hair and prevent additional damage while deciding how you want to handle the altered sections.
And Please Don’t Panic After One Silk Press
This is probably the biggest thing I want you to take away.
Using heat does not automatically mean you have heat damage.
Heat damage is influenced by things like:
- Temperature
- Duration of heat exposure
- Frequency
- Direct contact with the hair
- Hair condition before styling
- Tension
- Whether heat is being repeatedly applied to the same sections
- Whether the hair is already compromised
A properly executed heat-styling routine and repeatedly frying the same section of hair are not the same thing.
Your hair doesn’t need to live its entire life in fear of a blow dryer.
It needs intentional heat use.
How to Reduce Your Risk of Heat Damage
If you love silk presses, blowouts or stretched styles, here’s where I would focus.
1. Don’t apply high heat to soaking-wet hair unless the tool is specifically designed for it.
Let your hair reach an appropriate damp/dry state for the tool you’re using.
2. Use a heat protectant.
And actually distribute it through your hair.
Don’t just spray the outside of your head and call it a day.
3. Don’t keep going over the same section.
Repeated passes mean repeated heat exposure.
4. Control the temperature.
More heat isn’t automatically better.
Use the lowest temperature that allows you to achieve the result you want.
5. Don’t chase perfection.
Especially with natural hair.
You don’t need every strand bone straight to have a successful silk press.
6. Give your hair breaks.
If you’re constantly manipulating and heat styling your hair, your cumulative exposure increases.
7. Pay attention to your ends.
Your ends are the oldest part of your hair.
If you’re trying to retain length, they deserve some extra attention.
My “Don’t Panic Yet” Checklist
Before you decide you have heat damage, ask yourself:
☐ Did I actually wash my hair and allow it to fully revert?
☐ Is the same section behaving differently every time?
☐ Does the questionable section feel different from the rest?
☐ Is it more fragile or breaking more easily?
☐ Does it have noticeably different elasticity?
☐ Is the change persistent rather than temporary?
☐ Could product buildup, dryness, stretching or manipulation explain what I’m seeing?
If you answered yes to several of the heat-damage indicators, it’s worth treating that section more gently and monitoring it.
If the only thing you’re noticing is:
“My curls aren’t as defined today.”
Don’t panic.
That alone isn’t enough to diagnose heat damage.
And Here’s the Biggest Reminder…
Your hair is not failing because it doesn’t look exactly the way it did before your last silk press.
Natural hair changes.
Weather changes it.
Products change it.
Manipulation changes it.
Water changes it.
And yes, excessive heat can change it too.
The goal isn’t to be terrified of heat.
The goal is to understand your hair well enough to know when something has actually changed.
So before you reach for the scissors, wash it.
Condition it.
Let it revert.
Observe it.
Compare it.
And look for patterns instead of panicking over one bad hair day.
Save This Before Your Next Silk Press
If you’re nervous about heat damage, bookmark this guide and use it before and after your next heat-styled look.
Take a few pictures of your natural hair beforehand.
Then after your next wash, compare:
Curl reversion → elasticity → texture → breakage.
That’s going to tell you a lot more than a viral TikTok “hair test.”
The bottom line:
Heat isn’t automatically the enemy. Uncontrolled, excessive or repeated heat exposure is where the concern comes in.
And if you’re still unsure whether what you’re seeing is heat damage, a licensed hairstylist or dermatologist can evaluate your hair and scalp in person.


Leave a Reply